The communication modules RevPi Con M-Bus and RevPi Con CAN are extension modules for RevPi Connect.
When assembling these modules you have to consider following:
- You can connect one RevPi Con M-Bus or one RevPi Con CAN module to the RevPi Connect. If you connect two identical modules, none of them will work.
- You can connect a RevPi Con CAN and a RevPi Con M-Bus module to the RevPi Connect.
- The communication module is powered via RevPi Connect.
Notice! Use the ConBridge to connect the communication modules on the right side to the RevPi Connect. The communication modules can be damaged if you accidentally connect them to the PiBridge on the left side. You can distinguish the jumpers on the color. The ConBridge is grey and the PiBridge is black.
Notice! The modules may only be connected and removed as long as the power supply of the RevPi is switched off, otherwise your devices may be damaged.
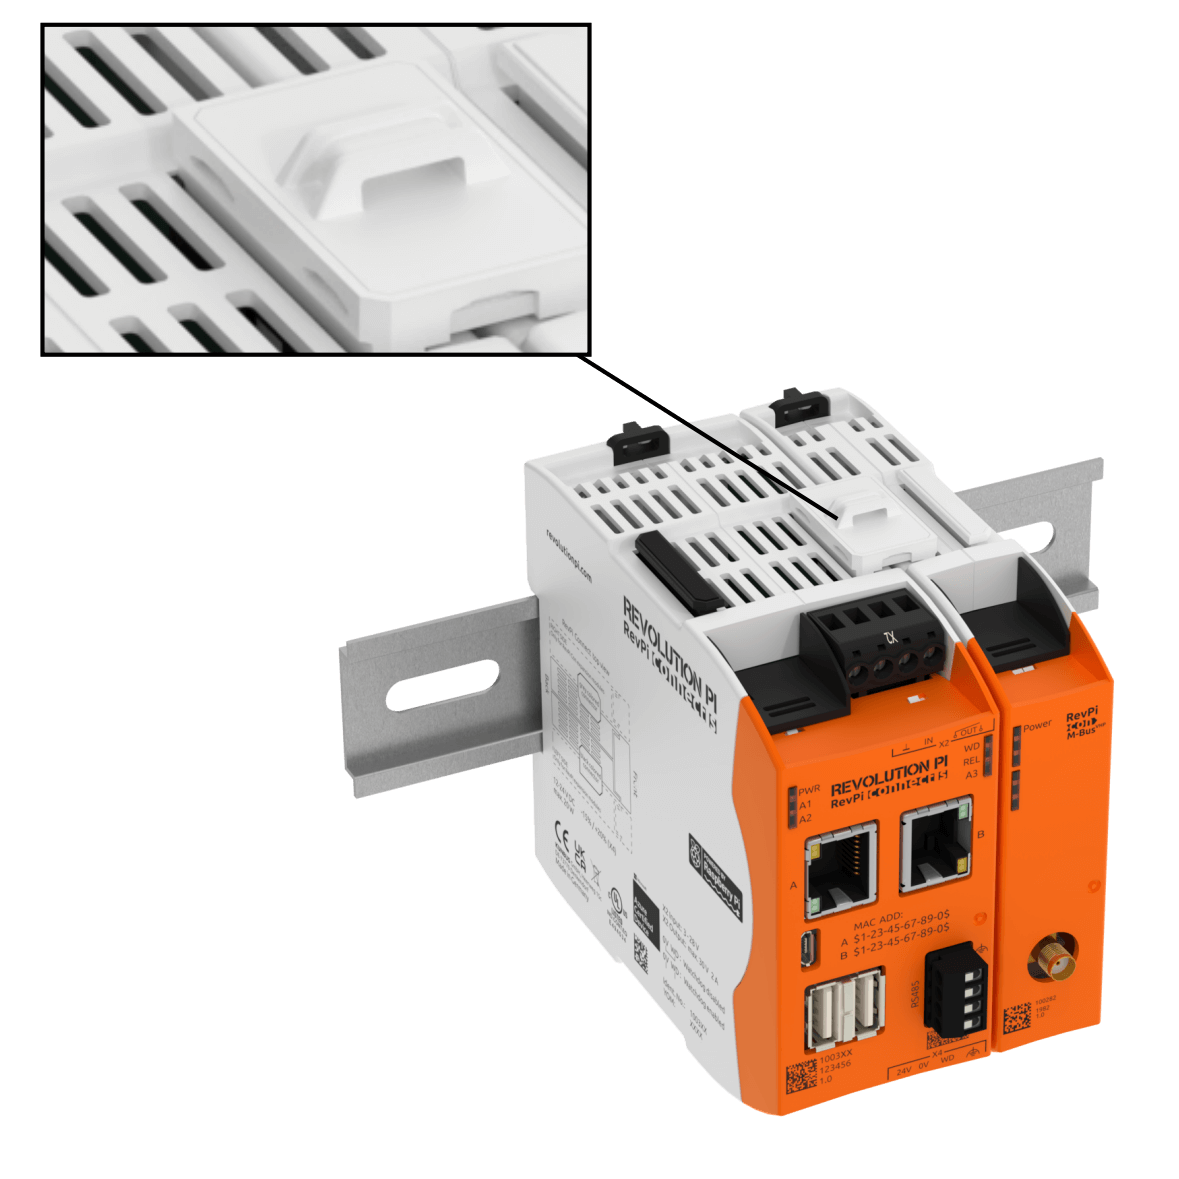
- Plug the ConBridge into the ConBridge connectors of the RevPi Connect and the RevPi Con M-Bus as shown.
The data is transferred via signal lines from one module via the ConBridge to the other module.
The individual signal lines are assigned as follows:
| Location | Signal |
| 1 | RX |
| 2 | TX |
| 3 | GND |
| 4 | SPI.CS |
| 5 | SPI.MISO |
| 6 | SPI.CLK |
| 7 | SPI.MOSI |
| 8 | GND |
| 9 | RESET |
| 10 | +5V |
RevPi Con M-Bus/ VHP
You can access the RevPi Con M-Bus module via the serial interface “/dev/ttyConBridge”.
How to retrieve data from an M-Bus device can be found in the operating instructions of the chip manufacturer:
- Con M-Bus MBUS User Manual
- Con M-Bus VHP RC17XX(HP)-RC232 User Manual, MBUS User Manual
RevPi Con CAN
The RevPi Con CAN must be configured in the Linux device tree. There are three ways to do this:
- Insert the module into your PiCtory configuration.
- Activate the module in tab CONFIG in the configuration web page.
- Run the commandl
sudo revpi-config enable revpi-con-canin the command line.
In all three cases, reboot the RevPi Connect afterwards.
You can find out how to control the Con CAN module here.