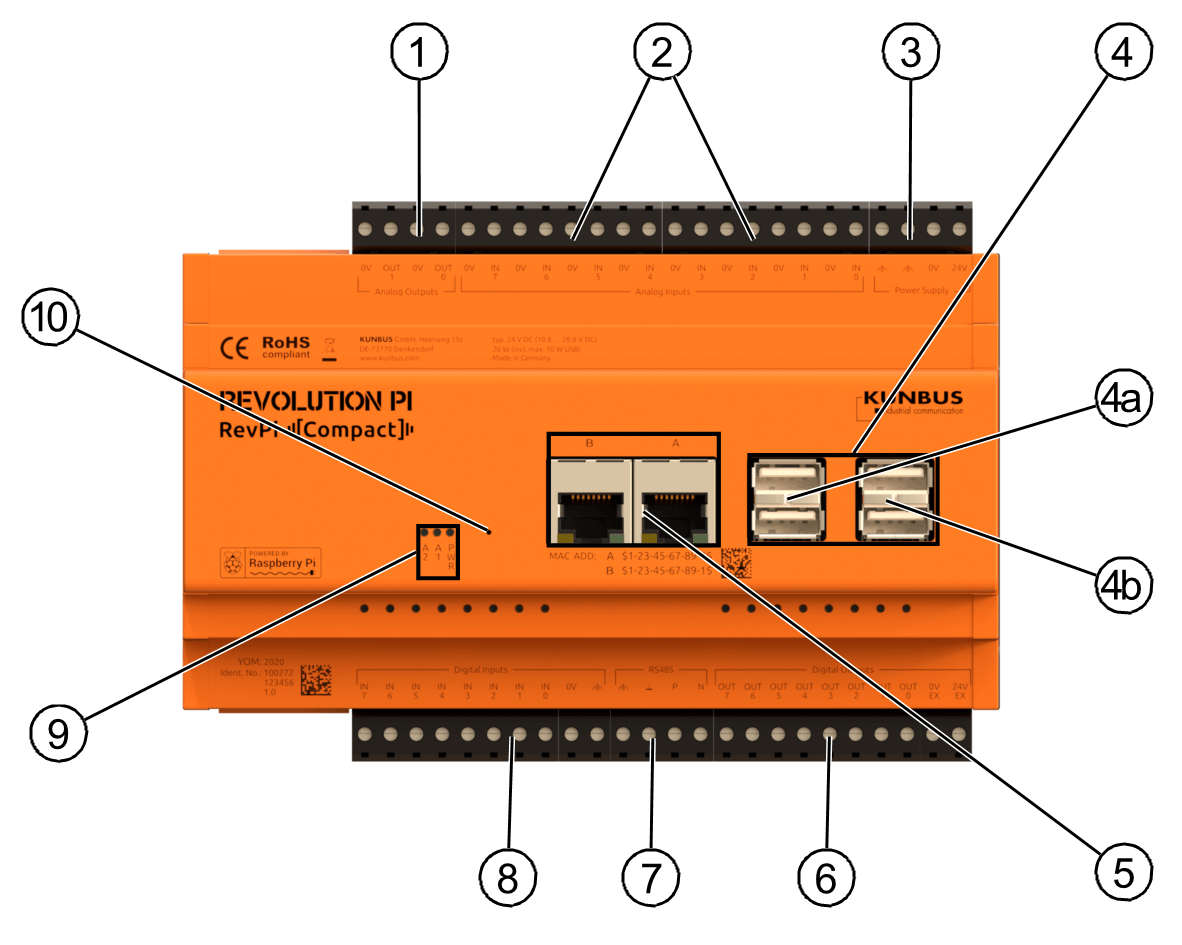
The RevPi Compact has various connections which may be needed for your projects. Here you can find out what they are and what you can use them for.
Position
Connection
1
Analog Outputs Your RevPi Compact has two analog outputs. Here you can connect actuators working with analog signals commonly in the industry.
2
Analog Inputs Your RevPi Compact has eight analog inputs. Here you can connect sensors working with analog signals commonly in the industry.
3
Connector for the Power Supply Do not connect the power supply until you have mounted your device on the DIN rail. You can operate RevPi devices in a voltage range of 12 V-24 V. Read the instructions on how to connect your RevPi Compact in the chapter “Connecting the Power Supply“.
4
USB Connector Four USB-A ports are available. This allows you to connect USB 2.0 slave devices (e.g. USB hard drives, WLAN sticks etc.).
The internal sockets (4a) may be loaded with a maximum of 1 A each.
The external sockets (4b) may be loaded with a maximum of 500 mA each.
The total load for all 4 USB ports must not exceed 2 A.
If you need more than four USB-A ports, you can find a suitable USB hub in our shop.
5
RJ45 Sockets Two Ethernet ports are available. Each of the two sockets is designed for different requirements. Read more here . Tip: If a small installation depth is important for you use an angled plug.
6
Digital Outputs Eight digital outputs are available. You can use it to send out signals.
Please note that the digital outputs at the 0 V and 24 V connections require separate power supply.
7
RS485 Interface Your RevPi Compact has a 2-pin RS485 socket. This allows to connect e.g. sensors for Modbus RTU.
8
Digital Inputs Eight digital inputs are available. You can use it to read signals.
9
Status LEDs The RevPi Compact has three status LEDs. We have already assigned the “PWR” LED. It indicates whether your RevPi Compact is operating properly (green) or if there is a problem (red). The remaining LEDs can be assigned freely to your own projects. The LEDs can light up in bi-color green/red.
10
Reset Button The reset button allows to reboot your entire system. You can press the button by means of a thin object (e.g. a needle).
Position
Connection
1
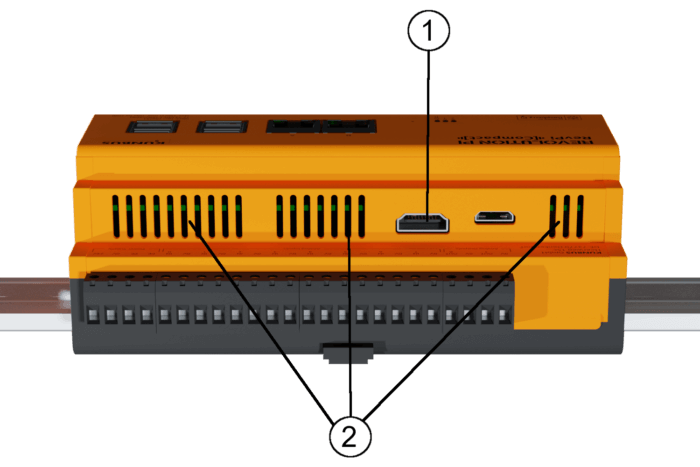
HDMI Connector You can use this connector to connect an HDMI monitor.
2
Ventilation Slots Air flows through the ventilation slots from the bottom to the top of the device and cools the electronics (chimney effect). Make sure that the ventilation slots are not covered and follow the installation distances.
Position
Connection
1
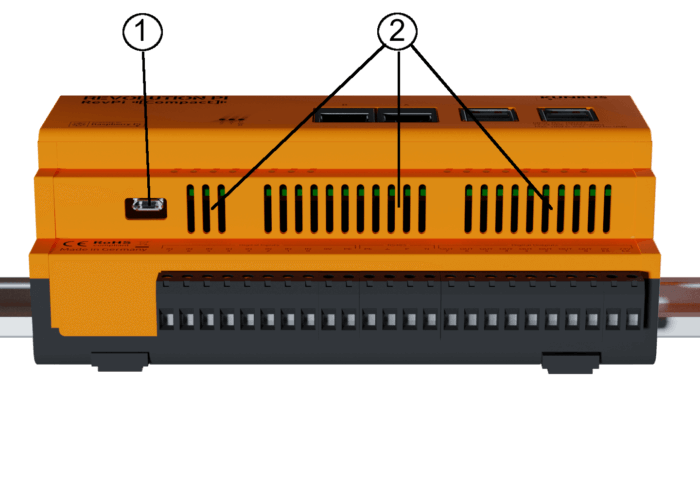
Micro USB Connector You can connect a USB host system here (e.g. a PC to download software to your device). Note: Unplug the micro USB connector after you have loaded the software on your RevPi Compact. It will not start as long as the Micro-USB plug is inserted. Attention! Micro connectors are sensitive to mechanical stress (you probably know this from your mobile phone charging socket). Therefore, you should never apply force nor tilt the plugs, but insert them straight and softly. Never bend the plug to the sides, but pull it straight out of the socket.
2
Ventilation Slots Air flows through the ventilation slots from the bottom to the top of the device and cools the electronics (chimney effect). Make sure that the ventilation slots are not covered and follow the installation distances.