In this tutorial we will show you how to install and activate/deactivate PROCON-WEB IoT Runtime on your RevPi Core.
Installing PROCON-WEB IoT Runtime
Requirements:
- Your RevPi Core is ready for use.
- Your RevPi Core is in a network.
- Your RevPi Core has web status 1.1.3 or higher installed. (If not, we’ll explain at the end of this article how to update your web status.)
Let’s go!
- Start your RevPi Core and log in.
- Enter following command:
sudo apt-get update
- Enter following command:
sudo apt-get install procon-web-iot
PROCON-WEB IoT Runtime has been successfully installed on your RevPi Core.
In order to use the PROCON-WEB IoT Runtime, you need a license or the corresponding license file on your RevPi Core. How to get this license file on your RevPi Core, we explain in this tutorial.
Activate or deactivate PROCON-WEB IoT Runtime
You can enable and disable PROCON-WEB IoT Runtime via the web status of your RevPi Core. Proceed as follows:
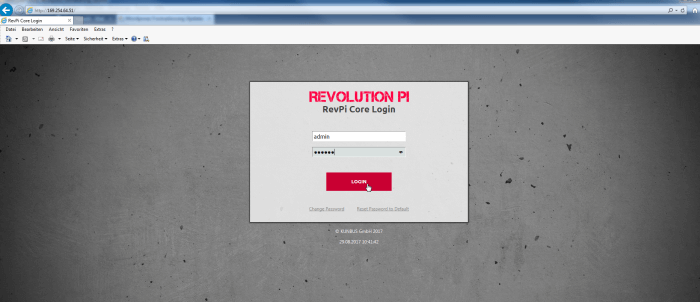
- Open your web browser.
- Enter the IP address of your RevPi Core in the address bar of your browser.
- Log in with the user name “admin”.
- Enter your password. It can be found on the sticker on the side of your RevPi Core.
- Click on “Login”.
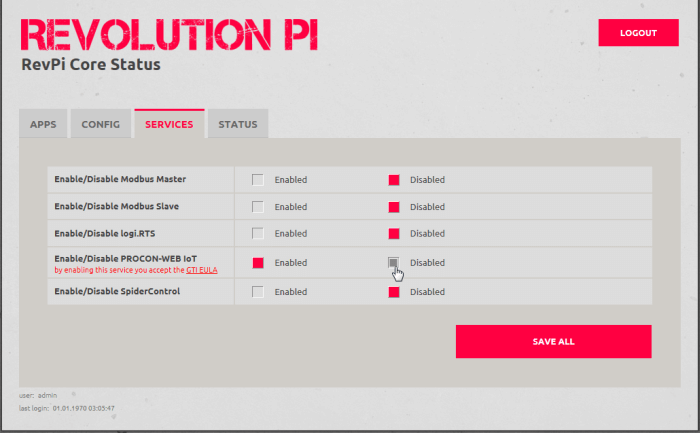
- Click the “Services” tab.
- In the PROCON-WEB Iot line select “Enabled” to enable or “Disabled” to disable the runtime.
Update web status
If you still have an older version of web status, you will not be able to see the runtime in the webstatus even if it is installed successfully. To update the web status of your RevPi Core, type the following command in the command line:
sudo apt-get install revpi-webstatus