With Jessie, we’ve also revised the web status for you. In the following chapter, we will show you everything that’s new.
But we’ll begin with the things we already know.
Let’s go
Logging onto the web browser
- Open your web browser.
- Enter the IP address of your RevPi Core in the address bar of your browser.
The log-in window appears.

- Log in with the user name “admin”.
- Enter your password. It can be found on the sticker on the side of your RevPi Core.
- Click on “Login”
The status page opens.
Apps
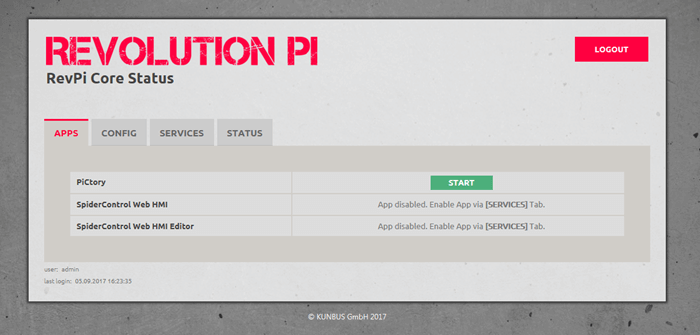
To be found in the apps register are some browser applications that you can start from this page. PiCtory is already activated.

- Click on “Start” to open PiCtory.
- For other applications, like for example SpiderControl, you first have to start the application service.
- To do so, go to the “Services” register.
Services
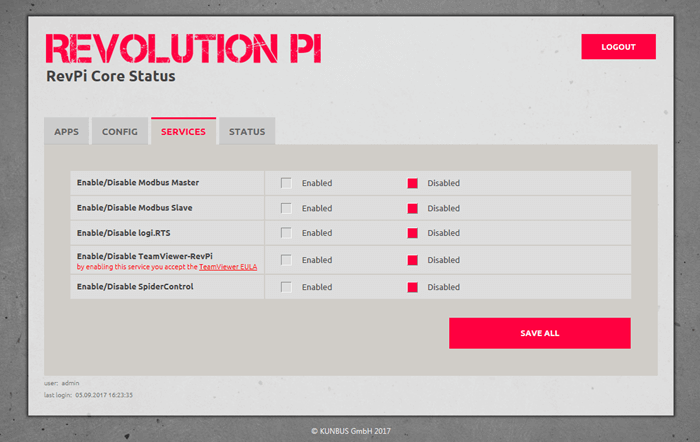
In this register, you will see services available for your applications. To use an application -for example SpiderControl – you first have to activate the respective service here.

- Click to activate the applications in the choice box before “Enabled”.
- Click to deactivate the applications in the choice box before “Disabled”.
After every alteration, “changed” will be shown in the respective status box.
- Click on “Save all” to save the settings. Up to 10 seconds may pass before the change is saved and the status updated.
If the changes have been successfully saved then “…saved” will appear. The settings are then saved permanently.
Config
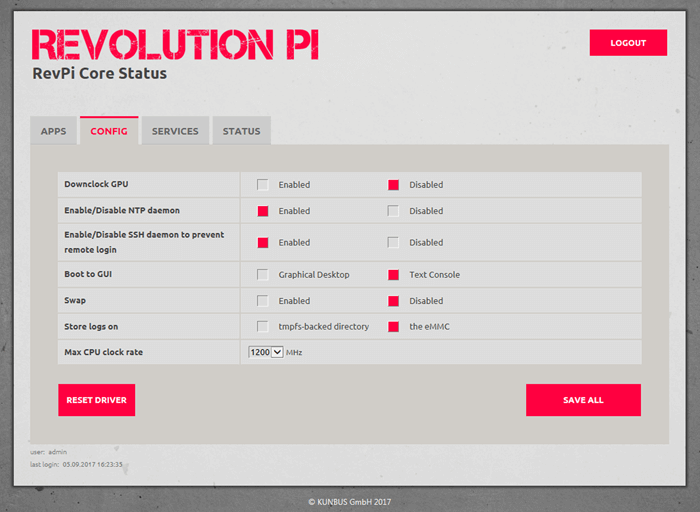
You can activate and deactivate various functions in this register.

- Click to activate the function in the choice box before “Enabled”.
- Click to deactivate the function in the choice box before “Disabled”.
- Click on “Save all” to save the settings. Up to 10 seconds may pass before the change is save and the status is updated.
If the changes have been successfully saved then “…saved” will appear. The settings are then saved permanently.
| Function | Description |
| Downclock GPU | Reduce graphic chip clock rate. |
| Enable/Disable NTP daemon | Activate/deactivate time synchronisation via the Internet. |
| Enable/Disable SSH daemon to prevent remote login | Activate/deactivate headless access via Secure Shell Host Protocol. |
| Boot to GUI | Activate/deactivate automatic start of the graphical interface. |
| SWAP | To reduce the access rate to eMMC ROM, the transfer of RAM data to eMMC can be deactivated. |
| Store logs on | To reduce the amount of access to eMMC ROM, protocol data can be diverted to a RAMDisk (tmpfs).
[] tmpfs: use RAMDisk [] eMMC: use ROM |
| Max CPU clock rate | Select maximum CPU frequency (only for RevPi Core 3). Depending on the temperature, the CPU clock rate can be automatically reduced. To guarantee constant system behaviour, it can be reduced in advance. |
Status
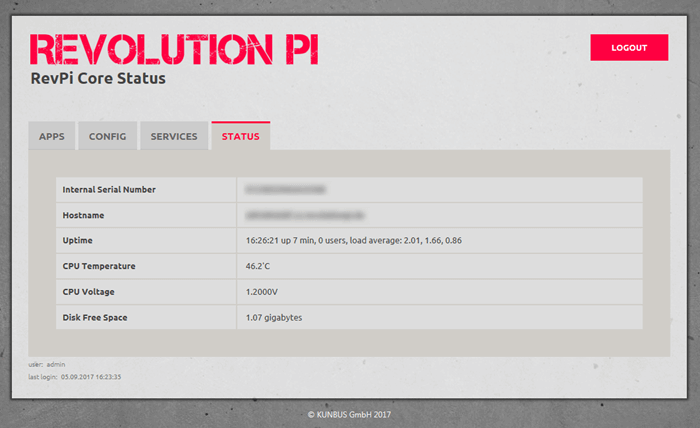
Information about your RevPi Core can be found in this register.

