We show you here how to save an image of the flash memory of your RevPi and how to install a new image on your RevPi. You can save the image on a USB stick, on the hard disk of your PC or on an external hard disk.
We use here a PC with a Windows operating system. But the whole thing also works with Linux or Mac. You can find tools and help on the Raspberry Pi homepage.
You require:
Hardware
- Your PC
- RevPi
- Power supply unit for the power supply of the RevPi
- USB (2.0) cable from type A plug tp micro B plug
NOTE: Use a high-quality cable. Poor workmanship of the cable can lead to transmission problems. - USB stick or other storage medium, e.g. hard disk.
NOTE: The free space on your storage medium must be at least equal to the size of the memory of your RevPi.
Software
Download the following files and programs and install them on your PC:
- Image
- RPi Boot (Windows Installer)
NOTE: Use the latest version. If you are using an older version, you may not be able to access your RevPi. - Win32 Disk Imager
- WinMD5Free
Backing Up Old Image to a USB Stick
- Connect your RevPi to the PC via its mini-USB socket using the USB cable.
- Start RPi Boot.
- Connect your RevPi to the power supply.
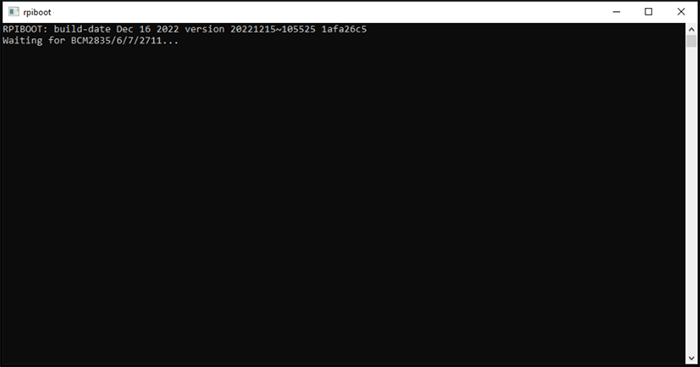
- RPi Boot will now search for your RevPi.
The following window opens (depending on your Windows version):

Your RevPi has been detected.
-
- Click on “Select to choose what happens with removable drives.”
The following window opens (depending on your Windows version):

- Click on “Take no action”.
- Start Win32 Disk Imager.
The following window opens:
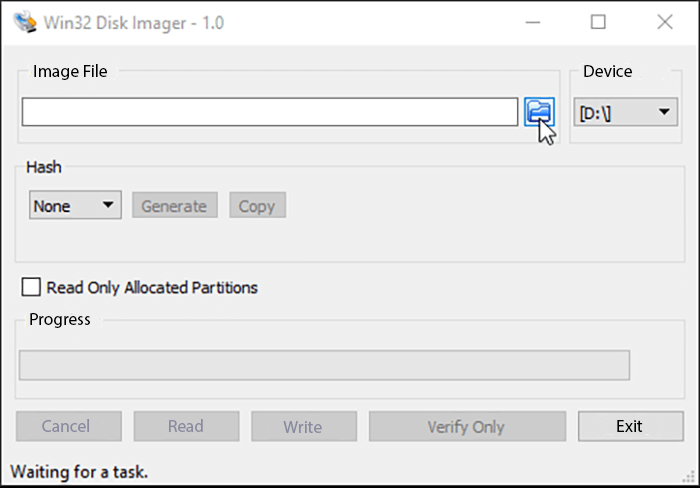
- Click on the folder icon.
- Select the USB stick to save the image there.
- At the end of the selection write the file name you want the image to have. The name must have the file extension “.img”.
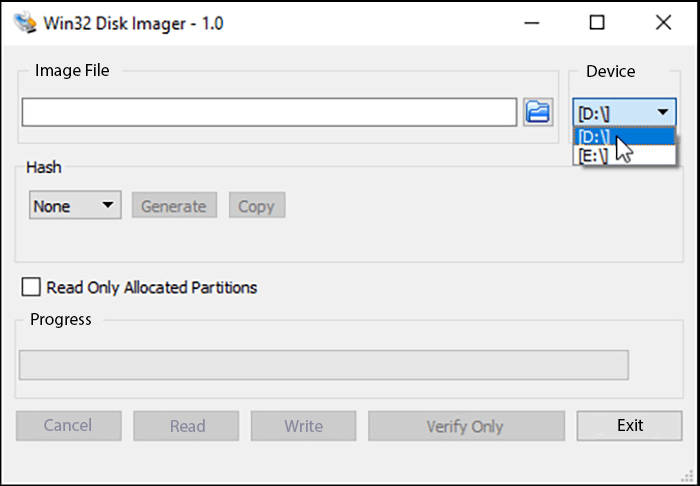
- Select your RevPi from the drop-down list under “Disk”.
NOTE: Only the drive letters are displayed for selection. If you cannot remember which one it was, you can look it up in Explorer. You can find your RevPi under “Devices with removable media”. It is displayed as “boot”.
Remember the drive. You will have to select it again later when you install the new image. - Click on “Read”.
The backup of your image will now be created. This process may take a few minutes. You will receive a confirmation that the file has been created.
Installing New Image
- First, unpack the image file downloaded from our homepage.
- Start WinMD5Free.
- Select the file of the new image.
The program starts calculating the MD5 checksum.
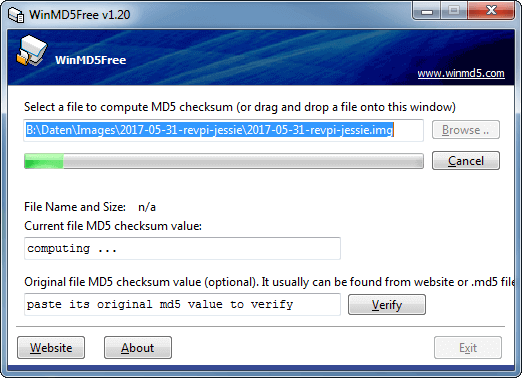
- After a few seconds the calculated checksum will be displayed.
- Open the *.MD5 file from the unzipped download with an editor. The file is called e.g. 2023-03-24-revpi-stretch.md5.
- Copy the MD5 sum, paste it in the “Original file MD5 checksum value …” field and click the “Verify” button.
If the dialog shows “Matched!”, the unpacked image matches the checksum we published.
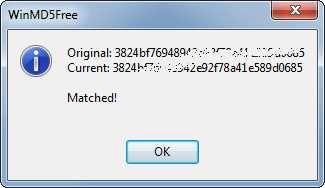
However, if “NOT Matched!” is displayed, the image is not correct. This can happen in rare cases when downloading or copying. In this case you have to download the image again before you can continue. Start again at “Uploading New Image“.
- Start Win32 Disk Imager.
- Select your RevPi in the drop-down list under “Disk”.
NOTICE! Check if you really selected your RevPi
.
If you select the wrong device, the data on the data medium are overwritten.NOTE:Only the drive letters are displayed for selection. If you can”t remember which one it was, you can look it up in Explorer. You can find your RevPi under “Devices with removable media”. It is displayed as “boot”.
- Click on the folder icon.
- Select your image file.
- Click on “Write”.
The following window opens:
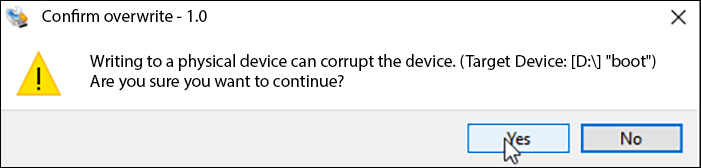
- Click on “Yes”.
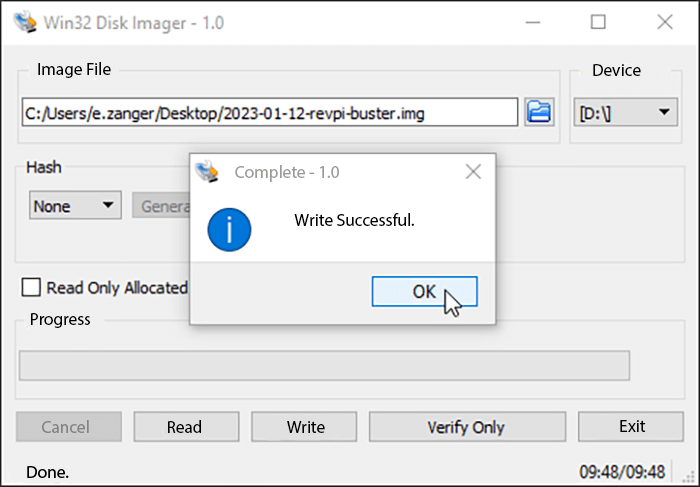
Your image will now be loaded onto the RevPi. This process may take a few minutes. You will receive a confirmation when the file has been transferred:
Logging on to the RevPi for the first time
- Remove the USB cable and turn the RevPi off and on again.
NOTE: While the USB plug is connected to your product, it is in flash mode and can only be put into operating mode by rebooting. - Log in to your RevPi.
NOTE: When logging in for the first time, the
login name is piand the
password is raspberry.
Consider the English keyboard layout when entering the password: you must enter a “z” instead of a “y”.
Configure RevPi at initial login
If you use a RevPi with HAT EEPROM, the message appears: “The device configuration was detected automatically. Manual configuration is therefore not necessary.
- Click on “OK”.
When you first log in, you will be asked which RevPi device you are using.
- Specify which product type you have.
The data that you need for the device will then be stored in memory.
NOTE: When making your selection in the “Product Type” drop-down list, pay close attention to the correct series, e.g. S, SE or +.
If you store the wrong product type, your RevPi device may not work properly after reboot.
- Enter the serial number and MAC address that are on the front of the case.
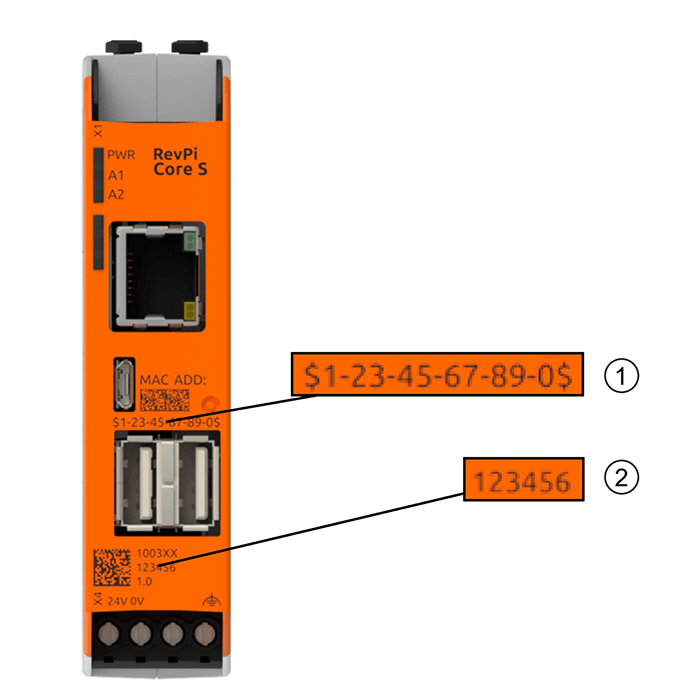
| 1 | MAC address | 2 | Serial number |
Restarting RevPi
The password for the next login is automatically reset to the default password that is on the sticker on the side of the RevPi device.
- Reboot your RevPi with
sudo reboot.
NOTE: Only after the reboot the device can be used to its full extent.