CODESYS Example: PROFINET I/O-Controller and PROFINET IRT Gateway
Introduction
This tutorial demonstrates how to run a PROFINET I/O-Controller on the RevPi Connect and exchange data with the KUNBUS Gateway PROFINET IRT Slave.
Prerequisites
Hardware Requirements
- 1 RevPi Connect+
- 1 RevPi Gateway Profinet IRT Slave
Software Requirements
- CODESYS Development System installed on your PC
Preparation
Hardware Setup:
Tipp: For detailed instructions about how to set up your system, refer to the Getting Started guide.
Software Setup:
note: To ensure a compatible system with suitable software, please refer the following links:
-
Proneta installed on your PC
Overview
The application writes:
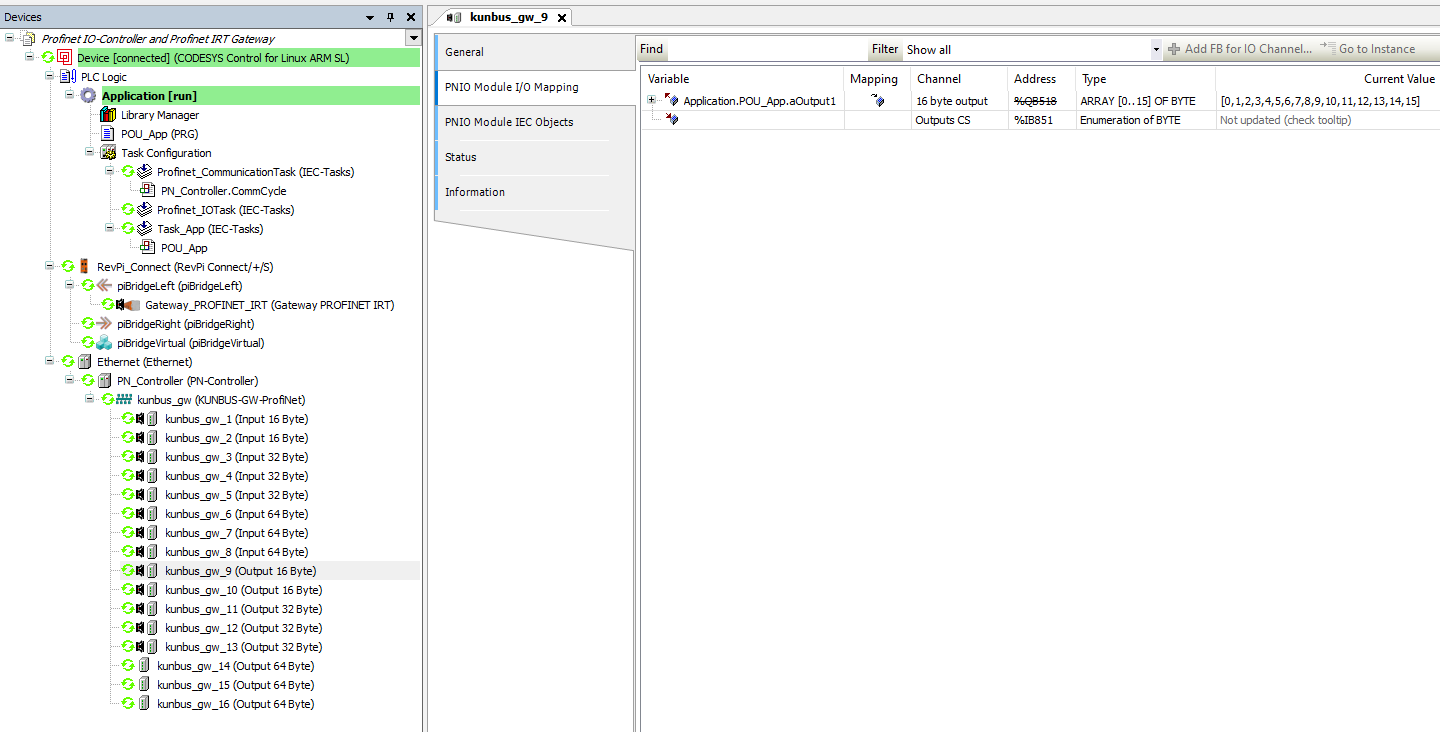
- [0,1,2..15] to the first 16 Bytes of the output slot (kunbus_gw_9).
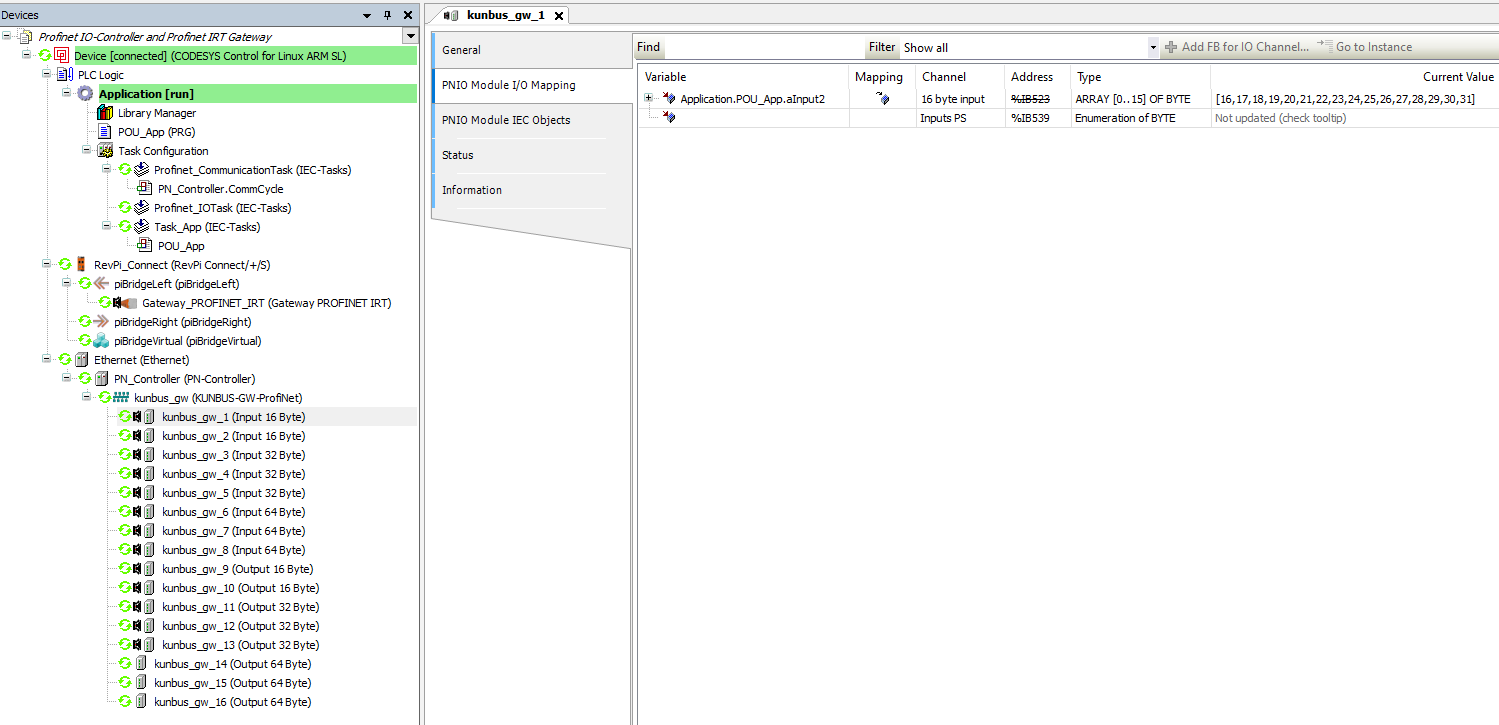
- [16,17...31] to the first 16 Bytes of the PROFINET IRT Gateway process image output area.
Step 1: Configuration
Network Configuration
- RevPi Connect:
▷ Configure the eth1 interface for PROFINET in /etc/dhcpcd.conf with the following settings:
# Example static IP configuration:
interface eth1
static ip_address=192.168.0.11/24
- Gateway PROFINET IRT Slave
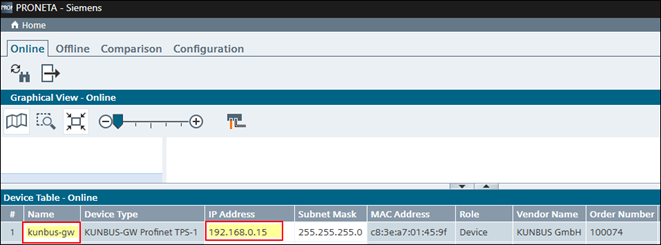
▷ Configure the KUNBUS Gateway PROFINET IRT Slave station name as kunbus-gw and IP as 192.168.0.15 using Proneta. For detailed instructions refer to the user manual of the Gateway component for PROFINET
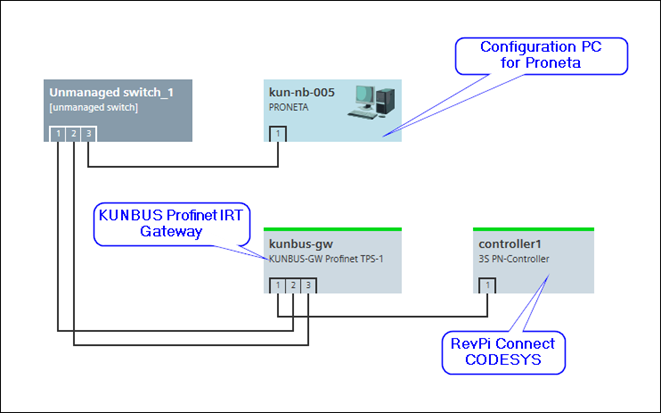
Graphical overview of the PROFINET network:
Step 2: Configure the PROFINET Network in CODESYS
- Scan for Devices:
▷ Open the PROFINET Controller (PN_Controller) interface.
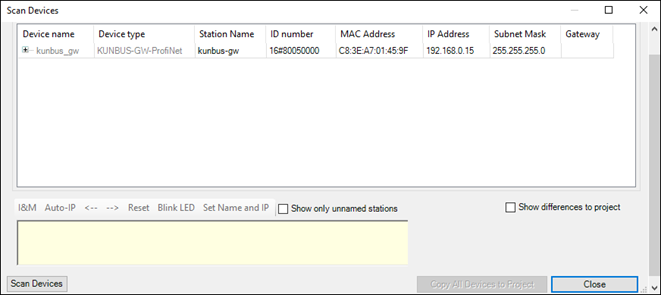
▷ Execute the Scan for Devices operation to identify the KUNBUS Gateway PROFINET IRT Slave.
- Add Device:
▷Use the Copy All Devices to Project option to add the I/O device to the CODESYS device tree.
▷ Alternatively, manually add the KUNBUS-GW-ProfiNet module in the CODESYS device tree.
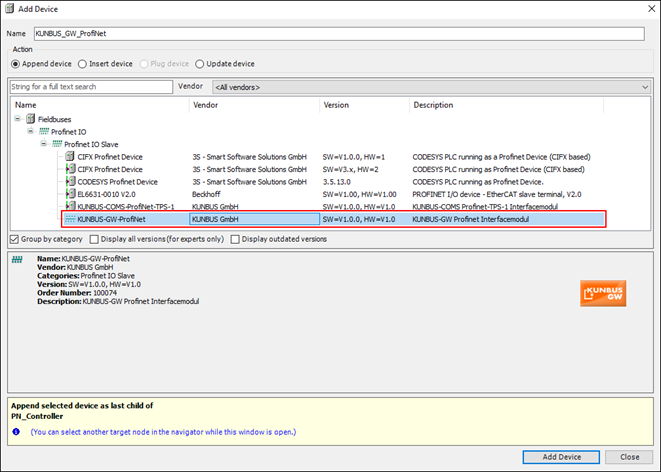
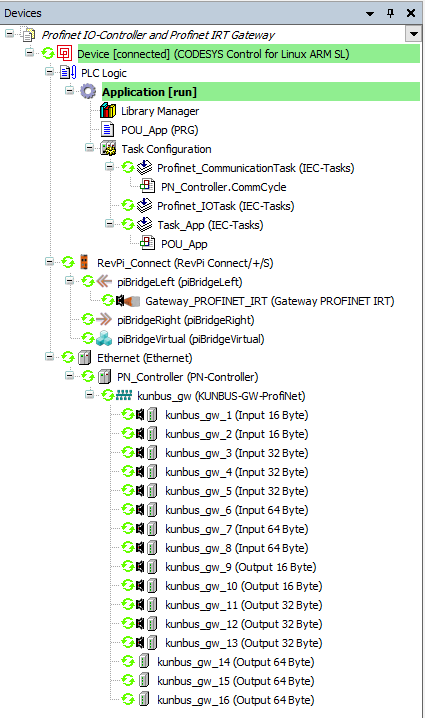
The following figure shows the CODESYS device tree overview of the example.
Step 3: Process Data Mapping
- Input Process Data:
Map the process data for the input slot (kunbus_gw_1) as follows:
- Input Bytes: First 16 Bytes.
- Output Process Data:
Map the process data for the output slot (kunbus_gw_9) as follows:
- Output Bytes: First 16 Bytes.
Step 4: Test the Configuration
- Run the Application:
▷ Deploy and execute the application on the RevPi Connect.
- Verify Data Exchange:
▷ Check the input and output process image areas of the KUNBUS Gateway PROFINET IRT Slave using diagnostic tools like CODESYS or Siemens Proneta.
Additional Notes
-
Ensure the IP address and station name of the Gateway match the configuration in Proneta.
-
For detailed instructions, refer to the KUNBUS Gateway PROFINET user manual.
This setup enables seamless data exchange between the RevPi Connect and the KUNBUS Gateway PROFINET IRT Slave.