CODESYS Example: RevPi CODESYS and Node-RED
Introduction
This example demonstrates how to exchange I/O data between a RevPi CODESYS application and an external Node-RED application using a RevPi virtual device.
Prerequisites
Hardware Requirements
- 1 RevPi Connect
Software Requirements
- CODESYS Development System installed on your PC
- Node-RED and RevPi Nodes Server enabled.
If you are using the full image, Node-RED is already pre-installed. If you are using the lite image, Node-RED is not pre-installed. You can install Node-RED according to the instructions at the following link: Running on Raspberry Pi: Node-RED.
- Web browser (for accessing the Node-RED interface and PiCtory)
Preparation
Hardware Setup:
Tipp: For detailed instructions about how to set up your system, refer to the Getting Started guide.
Software Setup:
note: To ensure a compatible system with suitable software, please refer the following links:
Overview
We use CODESYS Control for Linux Arm/ARM64 and Node-RED RevPi Nodes Server on a RevPi Connect. The CODESYS application includes a virtual RevPi device with 32-byte inputs and outputs that interact with a Node-RED application via the Node-RED RevPi Nodes Server.
Step 1: Create a Basic Flow in Node-RED
▷ Run the following command on Terminal to install the node-red-dashboard package:
npm install node-red-dashboard
Alternatively you can install node-red-dashboard by performing the following steps:
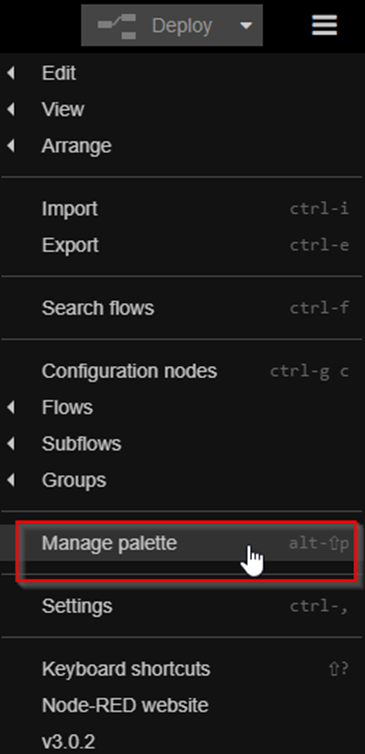
▷ Select the Manage palette option in the Node-RED Dashboard menu.
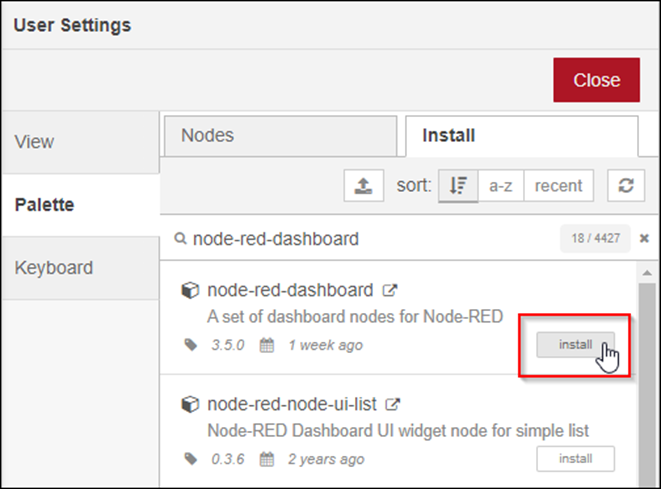
▷ Select the Install tab.
▷ Click install for the node-red-dashboard node.
➜ A number of nodes are now available in Node-RED that you can use to create a real-time data dashboard. You can find them on the Nodes tab.
Step 2: Import the "RevPi CODESYS Node-RED.json" Flow in Node-RED
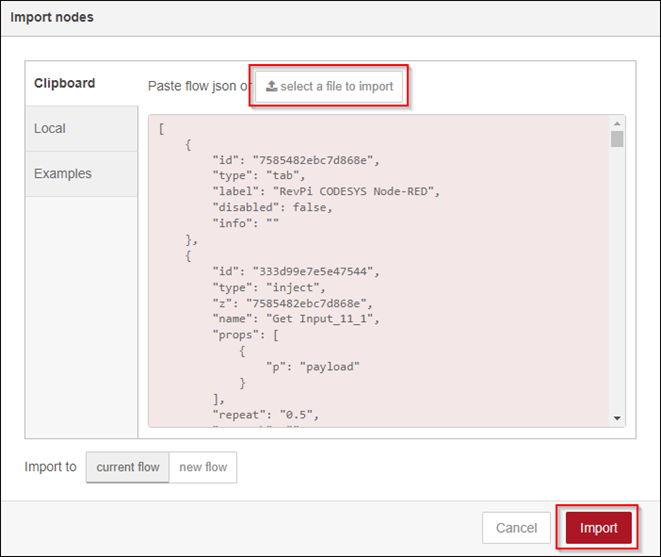
▷ Select the Import menu item
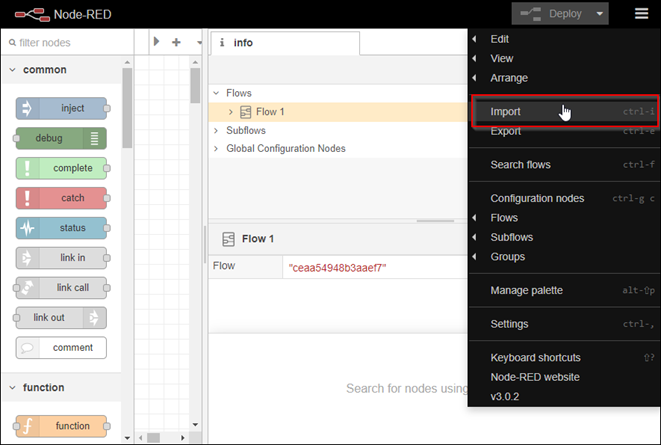
▷ Click on select a file to import and open the file RevPi CODESYS Node-RED.json in the Examples directory.
▷ To create the project as a new flow, select for Import to the new flow button.
▷ Select the Import button.
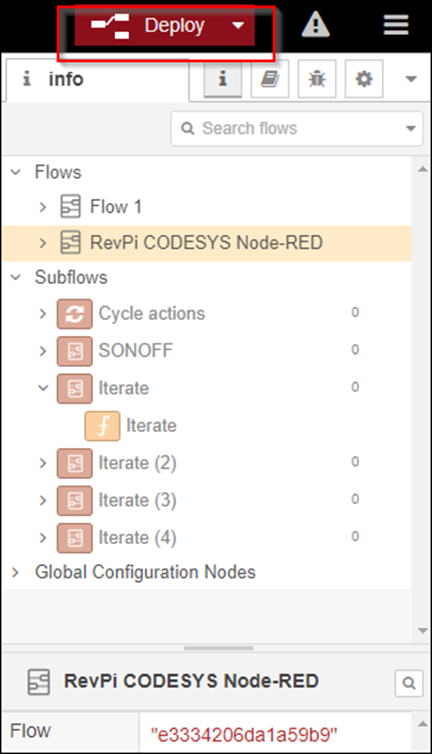
▷ To launch the application on the Node-RED server, select the De-ploy button.
Step 3: Setting Up the CODESYS Project
▷ Create the RevPi CODESYS Node-RED project from the Examples directory and download it to the RevPi Connect running CODESYS Control for Linux ARM SL and Node-RED RevPi Nodes Server.

Application Functionality
-
CODESYS to Node-RED Data Flow:
- The CODESYS application writes the values
[1 ... 32]to the 32 output bytes (Q_Virtual) of the virtual RevPi device.
- The CODESYS application writes the values
-
Node-RED to CODESYS Data Flow:
- The Node-RED application reads these 32 input bytes from the virtual RevPi device's address space.
- It then writes them back to the output address space of the virtual RevPi device.
-
Visualizing Data:
- In CODESYS Online Mode:
- The values can be observed under I_Virtual inputs in the Revolution PI Virtual Device I/O Mapping tab.
- In Node-RED Application:
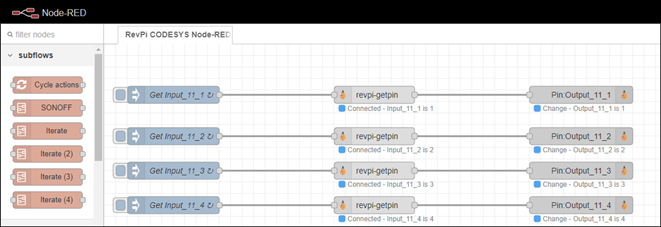
- Connection status and values are displayed next to each
revpi-getpin.
- Connection status and values are displayed next to each
- In CODESYS Online Mode:
➜ The Node-RED application displays the connection status and value next to each revpi-getpin.
